Contents (10 sections)
Creating DIY wall art can significantly enhance the aesthetic of your home, adding colour, personality, and a creative touch to your living environment. In this guide, we will provide you with a detailed step-by-step approach on how to craft beautiful pieces of wall art that can serve as a focal point or simply complement your decor. We’ll cover important aspects such as preparation, materials needed, and techniques for bringing your artistic vision to life.
Step 1: Define Your Style and Inspiration
Before you start creating your DIY wall art, it's crucial to define the style you want to embody. Styles can range from modern minimalist to rustic farmhouse or even vibrant bohemian. To gather your thoughts:
- Explore Pinterest or Instagram for design inspiration that resonates with your tastes.
- Create a mood board by collecting images, colours, and textures you like. This will guide you as you think about your art pieces.
- Consider the existing decor of your home. Choose colours and styles that will complement your current furnishings. According to recent studies, colour choices can evoke specific emotions and impact the ambiance of a room. Thus, aim for a cohesive look that integrates well with the overall aesthetic.
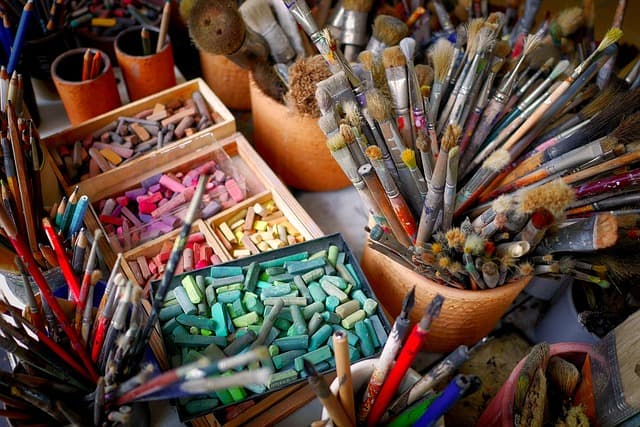
Step 2: Gather Your Materials
With your design in mind, it’s time to gather your materials. The beauty of DIY wall art lies in its versatility, thus giving you multiple options. Consider the following essential supplies:
- Canvas or Wooden Boards: These serve as your base for the artwork. Choose sizes that fit your wall space.
- Paints: Acrylic paints are a popular choice due to their vibrant colours and quick drying time.
- Brushes and Tools: Get a variety of brushes, including flat, round, and detail brushes. Other tools like sponges and palette knives can provide different textures.
- Additional Elements: Think about incorporating mixed media such as fabric, beads, or metals for a multidimensional effect. Explore your local craft store for unique items that can enhance your project.
Step 3: Sketch Your Ideas
Once you have your materials, sketching your ideas can help solidify your vision. Use a pencil to create light marks on your canvas, ensuring you can easily erase and adjust as necessary. Keep these tips in mind:
- Experiment with layouts: Before you commit to a design, test several arrangements. Consider balance, symmetry, and flow within your artwork.
- Use references: If you're aiming for something specific like a landscape or portrait, use photographs or prints as references to guide your proportions and perspective.
- Don’t hesitate to embrace spontaneous creativity! If certain elements inspire you unexpectedly, allow them to evolve your original design.
Step 4: Start Painting
Now comes the exciting part: painting your DIY wall art! Begin with a base layer to set the tone of your piece:
- Background: Apply a layer of paint that matches your planned colour scheme. You might choose to use a solid colour or create an ombre effect.
- Layering: Once the background is dry, start layering your primary designs. Be bold; sometimes, the most unexpected brush strokes can create stunning results.
- Details: Once your main elements are in place, add fine details that bring the artwork to life, such as highlights and shadows. It is often the small touches that result in a refined look.
- Allowing Dry Time: After painting, let your art dry thoroughly. This is crucial if you plan to add different mediums or varnish later.
Step 5: Finishing Touches and Display
After your art has dried, it’s time to add any final touches and find the perfect spot to display your creation:
- Varnishing: If you want to add a protective coat, use a clear acrylic spray or varnish to seal your artwork and enhance its longevity.
- Framing Options: A frame can elevate your art, adding a polished look. Choose frames that match the overall decor of your space.
- Hanging: Properly decide on the height for hanging your artwork. A common guideline is to hang artwork at eye level (approximately 57 to 60 inches from the floor). Think about spacing if you're hanging multiple pieces.
- Lighting Considerations: Effective lighting can highlight your wall art, making it more visually appealing. Consider LED tape or spotlights that create dramatic effects.
Checklist before starting your DIY wall art
- [ ] Decide on a style and gather inspiration.
- [ ] Collect all materials needed for your project.
- [ ] Create a sketch layout for your artwork.
- [ ] Prepare your workspace to avoid mess.
- [ ] Set aside dry time to ensure quality finish.
Glossary
| Terme | Définition |
|---|---|
| Acrylic Paint | Une peinture à base d'eau qui sèche rapidement et permet de nombreuses techniques artistiques. |
| Mood Board | Un collage d'inspiration utilisé pour rassembler des idées de couleurs, de textures et de styles. |
| Mixed Media | L'utilisation de différentes techniques et matériaux dans une œuvre d'art. |
Quick Quiz
> 🧠 Quiz rapide : Quel est le principal avantage de créer votre propre DIY wall art ?
> - A) Coût élevé
> - B) Unique et personnel
> - C) Temps de préparation long
> Réponse : B — Vous créez une pièce qui vous ressemble et qui est unique.
📺 Pour aller plus loin: Découvrez comment transformer votre espace avec des astuces de décoration créatives. Recherchez sur YouTube : "DIY wall art tutorial 2026".
Recommended Products
- LED Strip Light / Tape Kit: Perfect for illuminating your DIY wall art and enhancing its visual appeal.
- 3D White Flowers Wall Backdrop: Ideal for creating a stunning background for your home decor.
- Various Art Brushes: Essential tools for detailing and refining your artwork.
With these steps, tools, and inspiration at your disposal, you can now embark on a rewarding journey of self-expression through DIY wall art. Remember, the key is to enjoy the process and create something truly representative of you.
📺 Pour aller plus loin : DIY wall art tutorial 2026 sur YouTube
Recommended products
Selected by our experts